Saturday, April 30, 2011

{What's Cooking?} Peanut Butter Silk Pie

How about a little PB & C to sweeten your weekend? That's peanut butter and chocolate! I recently made mini Peanut Butter Silk Pies for a baby shower and have been getting requests from my husband and family ever since. It is easy to make, sure to satisfy a sweet tooth, and really isn't as heavy or rich as you might imagine. The original recipe comes from the Sea Cow Eatery in Edisto Beach, South Carolina. Instead of making a homemade pie crust, I use a prepared chocolate cookie crumb crust, which makes this an entirely no-bake treat. I just put one in the refrigerator for dessert tomorrow night with the in-laws. It literally took me less than 10 minutes from start to finish and it looks fabulous!

Photobucket

Peanut Butter Silk Pie

Filling:
- 1 package (8 oz) cream cheese, softened
- 1 cup sugar
- 1 cup creamy peanut butter
- 1 tablespoon butter, melted
- 1 teaspoon vanilla extract
- 1 cup heavy whipping cream, beaten until stiff

- 1 (9-inch) prepared chocolate cookie-crumb crust

Topping:
- 1 cup semisweet chocolate chips
- 3 tablespoons brewed coffee
- chopped peanuts for garnish

Directions:

Make Filling: Beat cream cheese, sugar, peanut butter, butter, and vanilla in a large mixer bowl until creamy. Gently fold in half of the beaten cream. Fold in the remaining cream until blended. Spread filling in prepared crust and smooth top.

Make Topping: Combine chips and coffee in a microwaveproof bowl. Cover with plastic wrap and microwave on high 1 1/2 to 2 minutes; stir until smooth. Cool chocolate slightly. Pour over top of filling. Refrigerate pie 1 hour until chocolate is firm. Cover loosely and refrigerate overnight. Sprinkle with chopped peanuts before serving.

I hope that you enjoy!

Friday, April 29, 2011

{Party Inspiration} Teacher Appreciation Week

With Teacher Appreciation Week coming up (yep, it's next week!) I thought that I would share this fabulous school-themed party by Leoni of Just Call Me Martha for a little inspiration. Whether you are helping plan a school celebration or just looking for some sweet ideas to send to your favorite teacher, this party is sure to inspire!


I love the use of chalkboard paint to create the backdrop, table "cover", and food labels. And how about using small blackboards in place of the traditional serving platters and cake stands. Genius! I bet that the buttercream math cupcakes would be a HUGE hit in a teachers' lounge. So many great ideas. This one definitely gets an A+ from me! Thank you for the inspiration, Leoni!

Tuesday, April 26, 2011

Plastic Egg Snake Craft

Wondering what to do with all of your empty plastic eggs now that Easter has come and gone? I found this adorbale craft idea from PreschoolRock.com: Make a Plastic Egg Snake. With a little help from an adult, your preschooler can recycle their leftover plastic eggs and create this fun rattling snake toy!


Materials:

- 15-20 Plastic Egg Bottoms
- 2 Whole Plastic Eggs
- Drill
- Yarn or String
- Permanent Marker
- A Few Dried Beans
- Tape

Directions:

Step One: (Adult needed for this step)
Using only the bottoms of the eggs, drill a hole through each plastic egg that is big enough for your yarn or string to thread through. Next, drill a hole through the top and bottom of the 2 whole plastic eggs.

Step Two:
Thread one of the whole eggs onto the string and tie a knot so it won’t slip off. Once it’s on, put a few dried beans inside. This will be the rattling tail. Then tape egg shut.

Step Three:
Thread on the egg halves until you have achieved the desired length.

Step Four:
Thread on the other whole egg and tape it closed. Draw two eyes on it and tie off the string, leaving enough to make a tongue on your snake.

Have fun with your rattling egg snake!

Monday, April 25, 2011

Strawberries, Strawberries!

Strawberry picking has been a family tradition ever since I can remember. I did it as a young child with my parents or grandparents every spring and I continue to do it with my own children each year. With spring in full swing and Virginia's strawberry season just around the corner, I thought that I would share some inspiring Strawberry Recipes. Click on the links for each recipe.

Strawberry-Orange Salad


No-Bake Strawberry Cheesecake


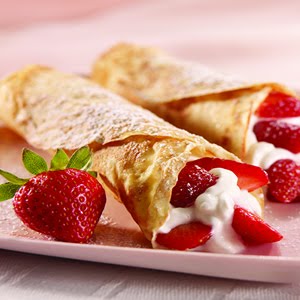
Strawberry and Yogurt Wheat Crepes


Strawberry and Spinach Salad


Frozen Strawberry Souffles


Strawberry Sorbet


Ready to go pickin'? I am!

Monday, April 18, 2011

{Real Parties} A Candy Shoppe Party

This week's Real Parties feature is the second party submission sent to me by Sara of The Homespun Hostess. Sara created A Candy Shoppe Party for her daughter's 2nd birthday party last year in honor of her daughter's love of lollipops. Once her daugther went to sleep the night before her party, Sara went to work transforming her dining room into an adorable Candy Shop (what a wonderful surprise to wake up to!). The final result is something that any child would LOVE!


Sara used inexpensive jars to display candy and add height to the candy table. She also covered Dollar Store popcorn boxes with coordinating cardstock and used them as cotton candy containers. Such a great idea! For the party, Sara ordered subs from a local sandwhich shop and wrapped them in colorful cellophane and tied with ribbon to look like candy. Love it!


I think that my favorite party details are the crepe paper backdrop and the mini gumball favors. To add color to her tan walls that backed the candy table, Sara taped bright pink and orange crepe paper streamers to the wall to create a beautiful stripped backdrop. For party favors, Sara found $1 gumball machines at Walmart (score!) and dressed them up with a personalized tag and some ribbon. They were a huge hit with the kids, as you can imagine.


Sara, once again you did a fabulous job. Thank you for sharing your daugther's party with Sheek Shindigs. To see more of Sara's creations and The Homespun Hostess, click here.

Friday, April 15, 2011

This Week's Giveaway Winner....

This week's Giveaway winner of the Sarah + Abraham calling cards is JENNIFER. Congratulations!!

Tuesday, April 12, 2011

A Train Themed Baby Shower Dessert Table

Choo Choo Choo... A Special Shower for Someone New! I recently designed a Train Themed Dessert Table for a baby shower that was held this past weekend. The expecting mommy is awaiting the arrival of her 3rd boy and will then be moving overseas within a month (Wow-Zas!). With the upcoming move, a theme for the baby's room has not been chosen however the excited couple is leaning towards a lime green and brown color scheme. A little birdie also told me that the mommy-to-be loves anything with chocolate and peanut butter, especially peanut butter pie! With this information in hand, I decided to use a lime green, brown, and blue color scheme and to incorporate a boy-friendly train theme into the dessert table, transforming it into a "Dessert Car".

I used several different elements to incorporate trains into the dessert table's decor. I created a "Dessert Car" sign that I framed and hung on a beadboard back above the table. I also placed trains, train tracks, tunnels, and train signs throughout the table and created train toppers and wraps for some of the desserts and display pieces. The dessert items were based around the mommy-to-be's love of peanut butter and chocolate. I decided that mini peanut butter pies would be a fun alternative to cupcakes. I hear that they were a big hit! The other desserts included double chocolate brownies, peanut butter blossoms, and assorted cake balls.


This really was a fun table to put together. I hope that you all enjoy it!